New Model Old Model Blackhawk

Sharps40

Old Mossy Horns
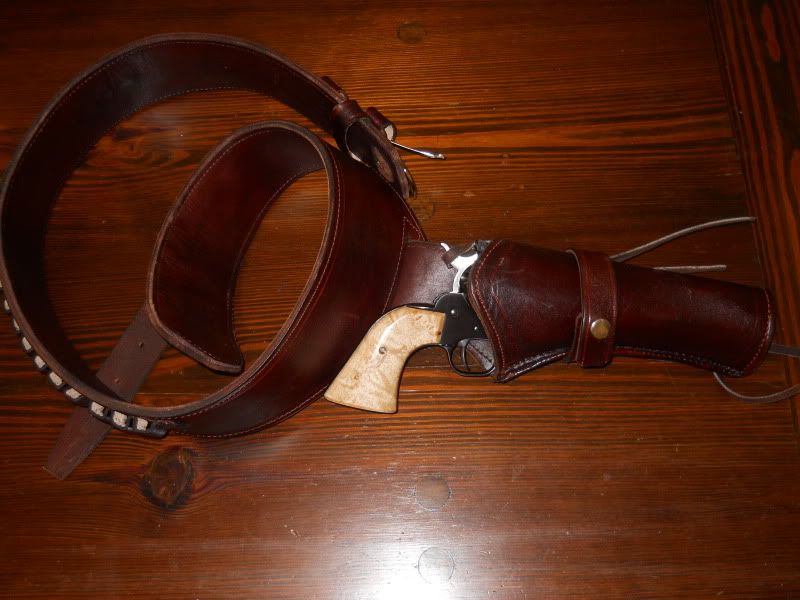
Well, got my first New Model Old Model Blackhawk.

I'll have to get pics up. Its the 50th Anniversary 357 flattop. Basically the late 50s size and shape with the current guts.

On the old school side it has Flat top, smaller frame, Steel Micro rear sight, 4 5/8", Steel Ejector Rod Housing, Steel grip XR3 (Colt size/shape/length of pull) frame, checkered rubber grips and faux ivory grips.

On the modern side it has internal lock and cartridge positioning, and the retractable pawl.

Looks great, just fits right in the De Santis cross draw holster.

High polish black and absolutely the smoothest and best fit of any Blackhawk I ever laid my boogerhooks on. Looking forward to shooting it. Something must be said for the new model guts, they are I think much better than the oft touted Old Model guts. Overall its a better gun and lots more refined.

Unfortunatly, it has an entire novel on the barrel and the dates on top are gold filled. Nothing worse on a gun that a book and filled lettering. It also has transfer bar pinch.

Once the cylinder index assembly, retractable pawl and internal lock are removed and the transfer bar pinch corrected it'll be perfect....cept for that dayum gold lettering.

Its heavier than an old model 3 screw too. Plan for now it to simply carry it and have some fun. At $350 for LNIB I'm pleased.
 

took

Ten Pointer
Contributor
I picked one of those up used last year as well. It is one of my favorite shooters! I wish I had also purchased the 44 mag model when they came out.
 

Sharps40

Old Mossy Horns
Don't know if its because its a 50th but the fit, finish and cosmetics are exemplarily. Much better than the run of the mill or even the old 3 screws. I am quite impressed with it right out of the box.
 

nchawkeye

Old Mossy Horns
I've got the .44 mag in the 50th, have really enjoyed it... :)

DSCN0826.jpg
 

Sharps40

Old Mossy Horns
First thing to do on this New Model Old Model is try out the free spin conversion. Cylinder movement unimpeded in both directions for loading and unloading. Simply remove the pin, spring and set screw that index the cylinder for loading and unloading. I doubt I'll be putting these parts back in the gun so they go in the box with the lock keys and factory grips. And, after trying the free spin, I doubt I'll like it either.......I already know how to load and unload and don't need the help of the extra parts, the old model did well enough with its following pawl.

The cylinder indexing plunger, spring and screw is removed from the back side. Here they sit on the Altimont Ivory Grips and you see the hole at 5 oclock where the CIP used to ride against the bottom of the cylinder ratchet.

vwrSCEl.jpg


See the bright spot at 12 o'clock on the grip frame? No machined groove there. What that tells me is that all the worries about cutting a matching mortise in a new grip frame for the new model retracting pawl is unneeded worry. (some grip frames have a mortise for the foot of the retracting pawl, this one does not.) So, simply select your new grip frame and if you want to retain a retracting pawl for free spin function, fit the dogleg of the pawl to the grip frame and don't sweat making a mortise in the grip frame. Too simple. If you don't want the free spin function, either reinstall the CIP or try installing a legless pawl. I'll probably install a legless pawl if I don't' like free spin in order to preserve the original parts of the gun in the gun box.

NTdYjjv.jpg


The grip frame is XR3/Colt style, closer to the trigger. It'll need a new mainspring seat to eliminate the lock which will never get used. I know, Ruger put the locks in dryers with bricks and steel bits and dynamite and acid and my wife complaining at em at full volume and none of the locks broke....that's nice, the lock will go in the pretty red box anyway.

bS37BX4.jpg


And if you look at the photo above and then here below, the XR3/Colt steel grip frame has plenty o meat for smalling it up later if ya got a roundbutt or birds head itch. Here is the grip panel pattern from Mr. Belly Gun. The Altamont ivory grips are cute, the factory checkered black plastic is tacky, wood is best I think. For now, the XR3/Colt shape is fine as is.

FXpjwmE.jpg


Not bad....a bit long, but almost okay and I could live with it...but the front sight is like all rugers, THICK. It does need a Bisley hammer....perhaps a nice stainless halfnotch model.

svLRrwN.jpg


The cylinder latch needs work on its top and forward curve. The cylinder line is already bright and the front curve of the latch is also marking the locking mortises on the front edge.

gqv2xAt.jpg


I hate filled lettering. I wonder if it'll wear off any time soon? Prolly not.

90AFRin.jpg


Nicely, the cylinder pin of the New Model Old Model mimics the function of a true 3 screw.....that is, fully removeable without having to unscrew and detach the ejector rod assembly. Good for cleaning and maintenance. And, no wing on the cylinder pin so you can install it without worrying about whether its turned too far around and going to scratch the barrel or bind about half way in or out.

OJNP6So.jpg
 
Last edited:

Sharps40

Old Mossy Horns
A bit of hoppes and a toothbrush and the gold glop is gone. The lettering will get covered by the long ramp that will be going on the barrel. I'll have to polish off the manual on the side.

gqvjonj.jpg


The free spin feature is not to my liking and since I have no intention of reinstalling the cylinder indexing pin assembly (I consider it superfulus, they are easy to load and unload without such additional parts) its time to remove the free spin leg at the bottom of the stainless steel pawl.

gy7TSr3.jpg


Once gone, some stoning is in order to smooth up the pawl since they are installed as cast/minimally finished.

P2CUCD9.jpg


Now the gun clicks like an OM and/or the Large frame NM (Stop rotation just before the click to load and unload. A process I am intimately familiar with and able to accomplish without thought) and like all the NMs and Vaqs retains the 6 shot capability and safety of loading/unloading with the hammer down.
 

Sharps40

Old Mossy Horns
Stainless steel Bisley trigger on the left. A larger loop to cradle and control the finger a bit better. Also, stainless, no rust. So, a bit of work on the engagement surfaces with stones and very fine silicon carbide wet/dry paper and its ready to install....almost.

uECfnYo.jpg


First, the trigger opening in the frame has to be opened, forward, by about 1/4 to 3/8 inch. A bit of work on the drill press and then with needle files. The bare insides cold blued for now as the gun go's thru its paces on the customizing bench. But, here the slot is about 99%.

h9XNiA5.jpg


Later this nice chunk of Moroso aluminum fuel line (3/8" OD and about 1/4 ID) will become the new foot for the mainspring and its strut, replacing the quarrelsome and always inaccessible (as long as the grips are installed) Ruger Lock.

91XywiF.jpg


The new SS Bisley trigger in the gun and all fitted. Its toe needed a bit of shortening and recontouring to clear the inside of trigger guard loop. Its a good fit in the hand carved slot and looks good installed.

sc3hGqX.jpg


And now, the advantage of the Bisley trigger. When the hammer is back and the sear locked in its notch, the Bisley trigger is even closer to the grip. Combine that with the Colt/XR3 grip frame of this model and we have a length of pull suited to normal and even short length fingers. That plus the trigger wraps around the finger and positions it the same way each and every time....Lovely!

ayRcP6p.jpg


And finally.....the factory trigger read 5lbs 6 oz with both spring legs hooked up....2lbs 8 oz with one spring leg disconnected. Here with the SS Bisley trigger, lightly fitted and installed, 3 lbs 4 oz with both spring legs hooked up. No creep, no grit. No need for one spring leg to be left unhooked. Just light polish and deburring in the right places and the Ruger trigger becomes quite manageable. Time to get back to the range and try it out on steel!

1b983hK.jpg
 
Last edited:

Sharps40

Old Mossy Horns
With the lock removed a temporary foot for the spring and strut is made up from aluminum tube. Functional but ugly. But, it can serve as a template for making up a functional foot from flat steel stock or 1/4" id steel square tubing. Once a steel part is made (and with the lock in the pretty red box) there will be exactly zero aluminum parts on the gun.

EgrXnSA.jpg
 

Sharps40

Old Mossy Horns
I am satisfied though. The fake ivory grips will eventually go. Scratched em up good working in the garage this weekend. On a goof, buffed most of the scar out, then had to rub it back out with fff compound by hand. To easily scratched and they look just like white plastic. Even tried aging them and nitric acid based stain won't even touch them, not even with gentle heating. So, wood later I am sure unless I can find real gutta percha grips or maybe some nice buffalo horn.
 
Last edited:

Sharps40

Old Mossy Horns
Never throw away extra parts. This, a spacer from a Class III Hitch. Just about right for forming up a foot for the mainspring and strut. First, roughing in a groove, just shy of 1/4" wide with the grinder....then some hand filing to square up and straighten the inside dimensions.

Yee0jLj.jpg


Cut off what I need. A few drops of 3 in 1 oil eases the work, makes a smoother cut and smells darn fine. 3 in 1 should be an aftershave too.

YJPNtdA.jpg


After forming the slot for the strut and cross drilling a take down pin hole and a bit of final thinning and shaping, the new mainspring foot on the gun and perfect function. Steel. I'll blue it later after the finish work. Also shown is some experimentation with long tall slotted front sight ramps. I have wanted a ramp that covers most or all of the 12 oclock position on the barrel of a handgun. These from Numrich, $4.50ish each have plenty of meat for sculpting and slotting or dovetailing. They can also be sweated on or drilled and screwed to a barrel.

dSROvbF.jpg


Sight options I have on hand. 1/4 wide sight beads on a .3" wide ramp. I can taper the ramp to match or even leave it a bit wide so there is windage capability on a dovetailed front sight. Other option is to utilize a slotted ramp for pinned in blades.

IX1pelM.jpg


A quick set of photos to show how much of a shortened barrel will be taken up by these 2.260" long ramps. And, if I decide for something different, the ramps can always be shortened and recontoured.

5FXXRFr.jpg


This would be the relative position of the ramp on a 3" or 3 1/8" barrel.

JKwCDhU.jpg
 

Sharps40

Old Mossy Horns
I was looking hard for a chunk of Amboyna Burl to make grips from when I ran across Bear Paw grips. Seems they have a set of Ambonya Burl grips ready made for the 50th/New Vaquero models. So.........paypal to the rescue.

I suspect I'll have them next week and will post photos when they arrive. I think they are great. Cinnimon color with many black eyes and swirls and they are stablized, so the finish is through and through and rock hard. Brass fittings and stainless screw, 15%ish larger on the top end and 10% thinner at the butt than factory grip panels.

I'm a bit excited. With any luck I can get through the bottom end of this project without dinging up the bluing, and that was almost a sure bet to happen trying to shape grip panels from scratch.
 
Last edited:

Sharps40

Old Mossy Horns
Okay. All clearances checked and I'm satisfied its ready to go to the range as a convertible with a fitted 9mm cylinder!.....cheeper and more plentiful than 22 lr and perfect for lots of close range practice and rolling cans.

Both the factory cylinder and the vintage 3 screw 9mm cylinder have fitted up for minimal endshake, BC gap between 4 and 5 thousands and case head to breech face clearance of 6 to 10 thousands depending on the make of the brass.

I am excited to try out the spare cylinder....now to find another for 357/44 Bain and Davis or 357 Auto Mag conversion.
 
Last edited:

Sharps40

Old Mossy Horns
OM 9mm on the left, NM/50th on the Right. All the measurements are the same, but by math, the OM 9mm is 20 thousands too long on the face and 2 thousands too long to fit on the front race.

Ti9KAzb.jpg


About an hours careful work slowly turning the OM 9mm cylinder back to fit the frame and establish a close BC gap of less than 5 thousands.

xxVcl37.jpg


Good function and the timing is spot on.

ctw7se5.jpg


Reversing the cylinder in the press and putting on a Black Powder bevel on the OM 9mm Cylinder. Face and bevel are final polished 100 grit for now.

5wOHQlS.jpg


Both cylinders installed for checks and measurements. I'm happy with the clearances and the variances due to different brands of case makers. It should be good to go.

ec4IdCS.jpg


After everything is wiped down and cleaned out. Perhaps test firing the 9mm at the range tomorrow and then the OM 9mm Cylinder will need blued for sure.

9OP8Xzw.jpg
 

Sharps40

Old Mossy Horns
The face of the OM Cylinder was actually concave or dished....about 6 or 7 thou in the center of the cylinders. Its dead flat now. Prolly just needs a light chamfer on the mouth of each chamber but I'll put that in with a piloted cutter later.
 

Sharps40

Old Mossy Horns
Success. The workout at 10 to 30 meters on paper and steel with ElCheepo handloads with copper plated 147s. Perfect function of the OM 9mm cylinder fitted to the 50th Blackhawk.

yRwQl4I.jpg


30 rds on paper at 10 meters and another 50 or so on various steel. Out to 30m my center hold hits on top of the sights and/or topples the plates with solid center hits.

07Qpyiq.jpg


Not bad for a drill press and a file.
 

ksherb

Six Pointer
Contributor
I have to say once again that you are an artist. Just for reference, I changed the oil in my truck last weekend (hooray for do it yourselfers), but in the process I somehow managed to lose the ability to make the truck turn left. Reading your posts is like going to a fantasy world where everything works.
 

Sharps40

Old Mossy Horns
Trust me my real world has plenty o twists that never make the big forum screen!

As for the truck, pull the steering wheel, spin it half way to the right and put it back on.....ya should recover some of that left turn ability!
 

Sharps40

Old Mossy Horns
Bear Paw Grips arrived. I'll give em 3.5 of 5 stars and not purchase the brand again unless the price is significantly discounted. More to follow.
 

Sharps40

Old Mossy Horns
The good first.

Fairly good fit overall considering the variances in frames. Fine figured wood, solid and no cracks or splits through the grain.

hqSj7qE.jpg


iacd8Gq.jpg


Ge4FtgQ.jpg


j6KK73X.jpg


tcaWFyn.jpg
 
Last edited:

Sharps40

Old Mossy Horns
And the not so good.

No spacer provided, but called for in the instructions. I reused the one from the fake ivory Altamont grips. Primarily the bad is horrific finish. These panels are touted as stabilized, that would mean an acrylic or similar all the way through the wood. Given the open pores, I doubt it. The final finish is discussed in the instructions, Tru Oil, Gobbs of it. Much leveling and polishing would be required to make it look proper. As it is, I'll shoot it first to validate the grip size and fit to my hand and then likely spend several hours in any reshaping that is deemed necessary and in the careful stripping and rubbing in of a Gun Grade finish.

So. Mark me more than a bit irritated at the price point for Bear Paw grips. Good fit, poor finish and only a portion of the time saved over what I was hoping for. I'll keep them only for two reasons, the figure and fit.

Poorly executed lock mortise and tear out at three of the four holes in the backside. Sloppy drips and sags in the finish on the backsides of the panels.

SY0E3mJ.jpg


Heavy topcoat of finish has the wavy and uneven look of a sprayed on finish. There has been no leveling of the finish and as such, the high gloss of the finish throws back the light unevenly.

72hkDIa.jpg


2lnbLfb.jpg


Heavy runs (hard to see on the photos) on the tops of each grip panel that will show after installing and finish coat failure (exposing wood grain) on the showing edge of one panel top.

l9OjH9L.jpg


m9kQftd.jpg


Finish applied to heavy/wet at the top curve of the right side grip, resulting in wrinkling and lifting of the finish from the surface of the wood.

h8KCqGV.jpg


Left panel rather grossly over sized compared to the right panel. Bottoms and mids are symmetric. Tops make the gun appear lopsided and amateurish.

LQk8GZj.jpg
 

Sharps40

Old Mossy Horns
First step is getting the slop off the back and leveling the playing field. A few dozen even swipes on grounded sandpaper removes the backside finish and removes the dips and bumps in the panels. A check and they still clearance the locator pin and lay flat and tight without any assistance from the grip screw.

PyjqvCd.jpg


From the first photo, it is clear the wood panels are in no way stabilized. If so, pores would be filled and buffing would bring the wood to a shine, i.e. no finish work beyond polish would be needed. Since its not stabilized, the first of several coats of thin/deep penetrating urethane sealer will be rubbed hot and dry into the wood, wooled between coats to keep the finish level and prevent the cheep built up bar top epoxy look of a glopped on finish.

YsvXtmx.jpg
 

Sharps40

Old Mossy Horns
A good bit of work both getting off the TruOil glop and doing some shaping so the grips fit my hand and I am able to hang on to the gun. I needed (smaller hands) much less wood at the top of the grip than what was provided and some thinning of the grip on the right panel for my trigger finger to reach the trigger and center it up on the pad for a consistent pull. Initially the tops of the grips were so thick and long that I couldn't reach the trigger easily and the grip was forced up and out of my hand....i.e. very little purchase with the last finger of the grip hand.

So, to the shaping....right panel first.....a bit of room by way of a relief for the middle finger of the shooting hand.

XhsHWWI.jpg


Similar work to be done on the left panel but this a bit higher and for the thumb to wrap around. Nicest part is the extra wood at the top allows shaping and I can retain some of the swell for repeatable positioning of the shooting hand.

bwaGpaA.jpg


After relieving both panels for fingers and thumb a bit of thinning, blending and shaping of the upper swells on the grip panels. Not as chunky as they were and not so thin as factory grips. Better for my average size hands.

J2Geiv6.jpg


The upper panels are compared as I go to get the swells much closer in size and shape to each other than they were to begin with. In all, I'm sure I removed over 1/16 to 3/32 of wood from the swells of each grip panel and they are still wider up top than factory ruger panels. These grips were rather club like in shape....much like a marlin stock, way too much wood in the wrong places to look well or even fit well. But, more is better, I suppose, since it allows for fitting to the hand and/or gun later.

uTAQ1qp.jpg


The upper halves of the grip panels are now much closer in shape. The left grip panel grooved a bit to the rear for the wrap around of the thumb from the backstrap. The right panel, grooved a bit to the front for the wrap around to the front strap of the middle and trigger fingers. The overall feel of the gun in recoil and recovery is much more repeatable and my grip is no longer so low on the grip frame that I seem to have eliminated the feeling that the gun is oozing up and out of my hand....i.e. the grip handle feels longer, more fingers wrap around it.

g26U9cn.jpg


Wet sanded twice with 220 and 400 and it looks pretty good.....but wait....

3ZshVzg.jpg


After drying and the first coat of urethane is rubbed in hot and hard......sanding marks pop up. I like to freeze the grain and sand once or twice more after whiskering as I've found with very hard figured wood like this that urethane will show any of the remaining sand/tool marks that water wiskering just won't bring out. Better to find it and smooth it out now than notice it in the final rub out. Some sanding marks that were not highlighted by water whiskering show up now in the lower grip at 3 oclock in the photo. More work with 320 and 400 after the first coat of urethane kicks over should clear them up.

E5iKDiT.jpg
 

Sharps40

Old Mossy Horns
I was recently advised that I in fact may not know what a quality grip looks like......I think these amboyna burls, nearing completion of their rework will rank among those fine home spun grips of curly maple, bloodwood and afzelia xylay that have been shaped for other projects. I think I'll stand beside those and these for quality. Mebby mine ain't masterful...but they look pretty darn good to me, and more importantly, they fit the gun and my hand.

The first freeze coat of urethane dried and polishing the last of the markings out of the wood. Wet/dry paper is used and the lube is that finest and most readily available of sanding paper helpers....spit.

rBWKbT5.jpg


Second coat of urethane rubbed in and the panels are done polishing. Time to move forward with carding and coating about four more times and then a final rub out back nearly to the surface of the wood for a dead level finish and a satin glow.

GUQzEbx.jpg
 
Last edited:

crittergitter

Ten Pointer
Looks great! Its a shame about your grips. You should not have to do all that work to a set of grips that come from a company that makes grips! If you want to start making your own from fine wood give me a PM and I can tell you where to get some in central NC.
 

Sharps40

Old Mossy Horns
Making up a try sight. I have four long ramps. So, plenty to experiment with. I want to end up with a ramp and bead/blade combination about .530 above the barrel.

Jigging up to drill a pair of ramps for an 8x40 retention screw.

jl2nibk.jpg


The Williams scissors jig paid for itself with the first four holes in a mauser many years ago. To this day it still delivers centered holes, even on tapered parts over and over again on my drill press.

CVJ0x22.jpg


Countersinking both ramps for a pan head 8x40 screw.

ENGOojm.jpg


The ramp is screwed to an old barrel stub and the top is ground down to the line.

252JUGa.jpg


Now it fits the sight dovetailing jig and I plow out one corner for the dovetail bead.

zU7C3Au.jpg


Plowing out the other corner then I'll plow out the middle. All done with hack saw and files.

tssz6oy.jpg


Final fitting of the sight to the ramp will be done with safe sided triangular files and no jig. The jig purposefully cuts a slightly undersize dovetail. Its finished when the sight can just be pushed snugly about halfway into the ramp with very firm finger pressure or light taps of a brass rod. From there only a sight pusher is used. Never use a hammer and punch to move sights on a ramp whether screwed or soldered on. To do so is to invite immediate removal of the ramp from the barrel.

2Vxyf1X.jpg


Looking good. Should be fine when pushed home later.

N1Zbalo.jpg


Now is a good time to clean up the left and right sides of the ramp and round over the nose.

m83xTxL.jpg


Next stop for this assembly will be on the barrel of the New Model Old Model to see how it looks.
 

Sharps40

Old Mossy Horns
After four coats of urethane rubbed in and cut back level and to the woods surface, the urethane is final polished with fff compound. After which, the first coats of hard wax are buffed into the wood by hand until hot and dry then rubbed out with clean terry. About 4 to six coats of wax will be rubbed in over the next day or so. The Glop is gone and the wood neither looks garish nor wavy. The feel is satin smooth and warm to the touch. Not cold like a shiny bar top. The shape is good. The fit is good. The grip is solid and the barrel to grip centerline runs along my arm bone without deviating left or right. Should make for a good pointer. And with the bit of swell up top in the grips, should handle recoil a bit better for me. A bit of arthritis in the fingers and gripping becomes more of a chore each year. No where near as beautiful as Afzelia Xylay in the alligator pattern but just fine for me and I'll leave this as is and move out front. Finally, the new steel and shorter ERH is inbound from the parts house, soon I can decide on barrel length and front sight options.

UNUIfit.jpg


yiQuYVn.jpg


eeQLg9N.jpg


d0DdZeL.jpg


Md41XRh.jpg


fukrCnX.jpg


nmpBWrF.jpg
 

Sharps40

Old Mossy Horns
A bit of finish work on the try sight ramp. Knocking off the sharp edges for a smoother less ruger square/sharp/blocky look.

Along the serrated portion of the ramp the edges are lightly filed to a 45 degree angle

pVWpZvD.jpg


and then bootstrapped with 120 grit to create a rounded over edge.

NKoixkB.jpg


The parallel edges on the dovetail portion do not need beveled over with the file. A simple kiss, bootstrap style with 120g is sufficient to soften and round over the sharp edges.

f4lCI19.jpg


Very small changes add up over all. The ramp remains substantial yet looks much less blocky. All that's left is to smooth over the nose out front.

7Bw9SOx.jpg
 

Sharps40

Old Mossy Horns
Back from ol kantuck....a couple days on my hands....so I planted 29 bulbs out front and got a buncha wild flowers and sunflowers to do yet but some time on the New Model Old Model too......

Sheriff length Vaquero steel ERH arrived today.......compared to the original steel full length ERH on this gun.....

jjKPWKj.jpg


Flame wrench and a good pipe full......the front sight has to come off it shorten the barrel and to jig the barrel for a new hole for the shorter ERH.

NZ8scy6.jpg


Jigged up and I use a dull drill and a small mallet to mark the spot I previously measured out and intented....if the dull bit just turns off the color around the divot I made, the jig is properly aligned for drilling the 6x48 hole for my typical stud and nut arrangement on the ERH.

WMy44Jf.jpg


After drilling about 1/10" deep I tap it 6x48 with bottoming taps and I get just over 4 threads....plenty.

Tx7uXGd.jpg


New 6x48 hole left....factory 8x36 hole right (the old ones had factory 8x40 holes....don't know why they changed....finer threads hold better in my opinion.)

lYnGKGk.jpg


The new Vaquero Sheriff ERH is test fitted, its spot on....

jIeMR1R.jpg


The muzzle is squared and crowned using piloted hand tools. I'll shorten a bit later and crown deeper too. Final touch will be rounding over the circumference of the barrel so the edge is not sharp and scraping into the holster or cutting fingers in cleaning chores.

CkaGl1d.jpg


With a little black max adhesive, the rough front sight ramp is placed on the barrel to get the overall look.....the ramp will need some more rounding and smoothing.

8IiQv1D.jpg


xast3hy.jpg


OqS5uxg.jpg
 
Last edited:
Top